Tuesday, February 26, 2013

Free local organic Food


Did you know that there's free food right in your backyard. Way to many people spend money to eradicate this very beneficial and tasty herbs. Right now there is a very very common "weed" that is at its prime right now. Well, I should say the leaves and roots are ready to harvest, then the flowers are ready when they first start blooming, then the roots again in the fall & winter, and repeat. This is one of the most renowned herbs by most herbalist.

This herb is Dandelion (Taraxacum Officinale).  Susan Weed has over 30 pages devoted to the benefits of Dandelion in her book "Healing Wise" and over 16 recipes. Rosemary Gladstar indicated on a webinar that I listened to last year (email me I'll send you the MP3) that dandelion is in her top 10 of favorite herbs. In Rosemary's book, "Herbal Recipes for a Vibrant Health" she writes that "Dandelion, is, I'm convinced, one of the greatest tonic herbs of all time." Now those are some powerful words from such a well known herbalist. Dandelion is one of those herbs that is ready to harvest at the perfect time when our bodies need extra cleansing (As with other herbs, such as cleavers, chickweed, etc, but more on that later). As the winter slows down and spring is right around the corner, the perfect herbs start popping above the ground for us to harvest. Kami McBride says that Dandelion is high in Vitamin A, C, and E, calcium, magnesium, and iron. It's also a bitter tonic herb, which increases the flow of saliva, which results in better digestion and stimulates the liver. Dandelion is even said to improve the enamel on teeth! There are so many wonderful things to say about this wonderful, yet top hated, herbs. 

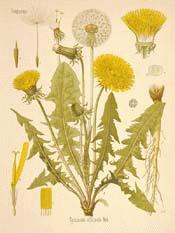
I've been enjoying eating dandelion greens and roots the past few weeks. I gather the plants as I clean out my garden and flower beds. I simple have two buckets; one for yard waste and the other for herbs to dry and/or eat. I had such a tasty lunch today that I wanted to share the recipe so you can also enjoy the bounties of the seasons.

 Sauteed Dandelion Greens

- 1/2 onion sliced in half moons
- 1 TBL coconut oil
- 1 TBL butter
- 5-10 dandelion whole plant (roots, buds, & leaves) seperated in root and greens
- 2-3 cloves garlic
- 1 tsp. sesame seed
- Salt & pepper to taste

Saute onion in coconut oil and butter until slightly brown and soft. Add chopped roots and cook 2-5 min. Add garlic and dandelion greens. Cook 2 min. until greens wilt. Add sesame seeds and season to taste. I thoroughly enjoyed these greens on top of a everything bagel and cream cheese. Oh so good. I might have to have this tomorrow!

Enjoy the early spring offerings that our wonderful land is providing us.


What other recipes and herbs do you enjoy this time of year?


References:

- Juliette de Bairacli Levy (1997). Common Herbs for Natural Health. Woodstock, NY: Ashtree Publishing

- Rosemary Gladstar (2008). Rosemary Gladstar's Herbal Recipes for Vibrant Health. North Adams, MA: Storey Publishing

- Kami McBride (2010). The Herbal Kitchen. San Francisco, CA: Conary Press

- Susan Weed (1989). Wise Woman Herbal Healing Wise. Woodstock, NY: Ashtree Publishing


This post is shared on http://www.picklemetoo.com/ and http://www.thenourishinggourmet.com

Tuesday, January 8, 2013

Sourdough Pigs in a Blanket

I started a sourdough starter a few weeks ago and my world has opened up. I want to add sourdough to everything that I can! Not only does it taste good, but it's better for you.

Check out this article about the benefits of sourdough. There's also a great recipe from my new favorite cookbook, "The Art of Baking with Natural Yeast" by Caleb Warnock and Melissa Richardson. My other go to sourdough book is"Alaskan Sourdough" by Ruth Allman. Both of these books provide different styles and recipes, but the results are both tasty!

I would like to share  a recipe that I modified from a soft pretzel recipe:

- 1 cup active sourdough starter (starter recipe post)
- 3-3-1/2 cups all purpose flour
- 1 cup water
- 1 teaspoon salt
- 1 Tablespoon sugar

Mix ingredients together until dough forms ball and is not very sticky. Place on floured surface and knead until soft.

Place dough in large greased bowl, cover with towel or plastic wrap, and set in warm place to rise to double it's original size. (1-2 hrs.)

Place on floured surface and roll into rectangle to roughly 14" x 12". I used 8 hotdogs, so if you're making more, roll out a larger rectangle.


 Cut 7" x 4" squares or big enough to roll a hotdog


Roll the dough around the hotdog and pinch the ends closed


Cut into 4 pieces


Place onto parchment paper lined (optional) cookie sheet.

At this point you can put the cookie sheet in the freezer and place in separate container once frozen for later use


For a crunchy crust, brush dough with water and salt before baking.

Bake 425 degrees for 20-25 minutes or until golden brown

Enjoy!

Sourdough Starter


I checked out wonderful book "Wild Fermentation" and "The Art of Fermentation" by Sandor Katz and this has generated an immense interest in fermented foods. Not only have humans been successfully preserving foods by fermenting for hundreds of years, it's healthier for us. Fermentation breaks down the foods, which allows our body to digest it easier.

Sourdough is fermented dough resulting in a natural yeast that helps bread rise, pancakes get fluffy, and taste so good. Another wonderful sourdough book that explains sourdough in simple terms and provides some awesome pictures and recipes is "The Art of Baking with Natural Yeast" by Caleb Warnock and Melissa Richardson.

After researching how to make a sourdough starter, I decided to use the simplest method that I could find.....water and flour.

Day 1: Mix equal parts by weight (slight less water than flour) of flour and water. The texture should be like a thick pancake batter. I decided to start our right and use whole wheat. Mix very well with a non-metal spoon.
Day 2: The starter will separate. Mix very well.
Day 3: I started to see bubbles! This is when you start feeding it equal parts water and flour to keep the consistency like a thick pancake batter
Day 4 and beyond: I feed my starter everyday and leave it on the counter to stay bubbly and active because I use it every couple days. If you aren't going to use it, just place it in the fridge. Feed it flour and water at least once a week to keep it active. Having it in the fridge slows down the fermentation process so it doesn't go "flat" as quickly as it would unfed in room temperature.

I hope this was straight forward enough. Let me know if you have any questions. Keep posted for sourdough recipes galore! I just can't stop myself from wanting to adding sourdough to every bread related food.


Sunday, December 30, 2012

Bath Salts & Bath Bombs


I know the Christmas season is done, but it's always a good idea to have gifts on hand to give as needed. Who doesn't like bath salts and bath bombs! The coolest thing about making bath salts is they’re super easy and you can make a bunch of them in a short amount of time. You can also make them fancy, fizzy, bubbly, colored, or just plain and they’re still so fun! I’m going to explain how to make a basic bath salt, a fizzy bath salt, and bath bombs.


Basic Bath Salts
Makes ~3 cups
Supplies:
o  Large bowl
o  Mixing spoon
Ingredients:
o  2 cup Epsom Salt
o  1 cup Baking Soda
o  ½ cup Oil, such as sweet almond, canola, shredded cocoa butter, etc (optional, but great for moisturizing)
o  10-15 drops, or desired amount, essential oil or fragrance (optional)
o  5-15 drops food coloring (optional)
o  Flower petals, such as rose, lavender, etc. (optional)
In a large bowl add dry ingredients, mix well. Add oil and mix. Add desired amount of essential oil/fragrance and food coloring. Mix well. I have found that the bath salts usually harden up a bit so don’t be surprised if you have to loosen them up after a day or so.


Fizzy Bath Salt
Makes ~4 cups
Supplies:
o  Large bowl
o  Mixing spoon
Ingredients:
o  2 cup Epsom Salt
o  1 cup Baking Soda
o  ¾ cup Citric Acid
o  ¾ cup Light Oil, such as sweet almond, canola, shredded cocoa butter, etc. (optional, but great for moisturizing)
o  10-15 drops, or desired amount, essential oil or fragrance (optional)
o  5-15 drops food coloring (optional)
o  Flower petals, such as rose, lavender, etc. (optional)
In a large bowl add dry ingredients, mix well. Add oil and mix. Add desired amount of essential oil/fragrance and food coloring. Mix well. The fizzy bath salts also harden up a bit so don’t be surprised if you have to loosen them up after a day or so.


Bath Bombs
Bath bombs are the same ingredients as the fizzy bath salts. The main difference is you have to add water via a spray bottle to saturate the salts in order to form into a bomb.
Spritz salts with no more than 2 sprays. Put your ear close to the bowl and listen to the crackles of the baking soda and citric acid. Mix well and continue until the salts stay together when pressed between your hands.
You can use just about anything for molds, such as silicone baking dishes, plastic Easter eggs, hands, etc. I used plastic Easter eggs because that’s what I have. To do this, you fill each half more than you think you should. Press both sides together with all of your might and let set for a minute or so. Slowly take the egg part off of the bomb without twisting. Even if they break and don’t stay together, ½ egg shaped bombs are cool too.
Another way of doing bath bombs is to do bath bomb chunks by spreading the mix in a cookie sheet. Let dry and break into chunks.

How to make bulk:
Of course you can just double, triple, quadruple, etc. the recipes, but here are some quick tips to make it faster:
-          2:1 ratio for citric acid to baking soda (ex: ½ cup citric acid to every 1 cup of baking soda)
-          2:1 ratio for salt to baking soda
-          All sorts of salts can be used, such as sea salt, epsom salt, or even table salt.
-          ½- ¾ cup oil to every 1 cup baking soda.
-          Oil/butters change the smell of the salts so keep that in mind on what oils/butters you add.


Packaging:
Bath salts and bombs look beautiful in most containers. Cellophane bags are a couple bucks at the local craft or party store. Most wedding sections in craft stores have a great selection of very cute jars and containers that hold roughly ¼- ½ cups of salt. Also, don’t forget the ribbons, labels, and all the other fun things to personalize the containers according to the wedding colors, bride and groom favors, etc.

Saturday, March 24, 2012

Homemade Breadcrumbs


During the cooler months I'm inspired to eat only homemade bread instead of store bought bread. I've been making some deliciously flexible almost whole wheat breads that I will share the recipe with you soon. Last night I made some bread, which was a total flop. I let the first rise way to long. I decided to move onto the second rise, shaped it into loaves, and baked it. Not surprisingly the bread was dense and not sandwich bread worth. Nevertheless there's always a use for recipes gone wrong. As in art there are no mistakes, so with cooking the mistakes can be turned into other things and these loaves turned into breadcrumbs.

To make homemade breadcrumbs all you need is bread! Break the bread into chunks and let them air out on a cookie sheet until dry. Pulse in a food processor until desired consistency. You could also put the crumbs in a plastic bag and hammer those crumbs out (sounds like a great time for the kiddos). I store my crumbs in the freezer to ensure they don't mold. The fridge probably works too.

Now you have breadcrumbs for chicken nuggets, meatloaf, macaroni and cheese, etc. No need to buy that who knows what's in it store bought breadcrumbs when you can make some at home. Enjoy.

Thursday, August 4, 2011

Laundry Soap

Who loves the fresh scent of cleanliness without all the chemical yuckiness? I know I do. I started making my own laundry soap as a means to clean my son's diapers. Homemade laundry soap smells of what you put in it. It doesn't stink of chemical perfumes and who knows what's. Sometimes I add a couple drops of lavendar or tea tree essential oil to my fabric softener ball, that is filled with vinegar, to add some beautiful scent and also cleans my clothes that much more.

Here's the basic recipe for laundry soap, which of course I double/triple as needed. The recipe below washes around 20-30 loads:

1 bar unscented soap (I used homemade plain lard soap, but you can use any soap you prefer to use)
1 cup Washing Soda (this isn't the easiest to find. It's always located in the laundry soap isle, but I have only found it at one local store, Fred Meyers)
1/2 cup borax


Grate up the bar of soap


Add all of the ingredients into a food processor or blender. Blend until everything is powdered finely.


To use I add 2 Tablespoons to a load. When I wash cloth diapers I add a handful (roughly 1/2 cup) of baking soda to help neutralize the smells and fill my downy fabric softener ball with vinegar (roughly 1-4/-1/2 cup). The baking soda and vinegar help to neutralize scents and keep the clothes smelling clean.

If you make your own laundry soap, please share your recipe. Shoot....if you make your own dishwasher soap, etc. please share because I'm looking to make as many things from scratch as I can.

Monday, June 27, 2011

Sunburn Relief

Summer is finally here in western Washington (I think....). The temperatures are consistently above 65 degrees everyday, the sun is out more than 1/2 of the day,the  heater hasn't been on for over a month, and the windows are cracked open all day and night. In the pacific NW that means it's summer, even if the rain joins us every couple days :) One thing that comes with summer no matter where you live is sunburns! I generally don't put sunblock on immediately when I go outside in order to give my body a chance to absorb some Vit. D, which is a serious deficient vitamin in the NW. Sometimes I remember to put some on after a while and sometimes I don't.

This last weekend my family and I went to an awesome hotrod show in Eatonville, WA, which by the way is a gorgeous cute little town at the base of Mt. Rainier. The sun was out and the hotrods shined. By 3pm I was feeling kind of crispy. Sure enough when I got home I was as red as a lobster.

Last summer I made a concoction with hopes to ease my sunburn pain and help heal burns quicker. I've heard that vinegar is good for helping soothe sunburns. I also know that St. Johns Wart and Lavendar are good for general burn relief (Note: if you ever get burned on the stove or by another means put some St. Johns Wart infused oil and Lavendar essential oil on the burn. The pain goes away and the St. Johns Wart prevents blistering). Both St. Johns Wart and Lavendar are starting to flower this time of year. St. Johns Wart is a "weed" around here and Lavendar grows in almost everyone's yard. Now is the time to make this for next year's sunburn relief. I've also read that St. Johns Wart is good for preventing sunburns (http://www.wisewomantradition.com/)

Here's how I made my homemade sunburn relief spray:

Supplies:
  • Large glass jar
  • plastic lid*
*if you don't have a plastic lid then you will need wax paper to prevent the lid from rusting

Ingredients:
  • Fresh St. Johns Wart flowers
  • Fresh Lavender flowers (preferably right before they bloom)
  • Apple cider vinegar
Gather as many flowers as you can to fill the glass jar (1/2 St. Johns Wart Flowers, 1/2 Lavendar flowers). Fill the jar with apple cider vinegar to the top. Let sit for minimum 6-8 weeks. Top off with vinegar if needed.

After 6-8 weeks strain herbs out of vinegar and place vinegar into a clean jar. You can either use the vinegar by pouring it into a spray bottle or putting some on a rag and rubbing in on the burn. I personally like spraying it on for ease of application. Either way let the vinegar dry on the skin and the sunburn will go away sooner then you think.

The sunburn that I got this last weekend (Sat.) is turning into a nice golden brown without peeling or any discomfort. I'm usually not an advocate for tanning in the slightest, but I must say it's kind of fun not being as white as a ghost after a burn.

Enjoy the summer and take care of your skin.